Monday, October 31, 2016

Happy Halloween

Hello ladies 

Today, I like to share a my Inspirational card for Halloween ... using 
I did create using the image by Sherri Baldy ..
you can purchase the image from 

Card size 14cm x 14cm 

The image has been colored in with Copic Markers 
and fuzzy cut around it . 
I have used alot of different die cuts in my card .. it was a hard 
work but quite happy with the result.
Paper and other embellishment were used from my stash. 

I hope that you all like what I have created & shared . 
Thanks for stopping by . 

Hugs 
Rose 

Saturday, October 29, 2016

Holiday Wishes and Gingerbread Kisses

The Holidays are coming and baking season
for me will be in full swing.

Thinking of baking and all the yummies, today I would
like to share with you the new Gingerbread Papers Mega Kit.


Complete with over 30 adorable papers to create with this season.


We can not forget the adorable gingerbread images also that you
could use with this set.


You can find ALL the Holiday BESTIES HERE


I carried some more papers to the inside to finish it off.


SURPRISE!!!  It is a panel pop out for more fun.

I colored img815 for the front and scanned it to make smaller 
printable for the inside.

You can find out how I made this card on my blog.


Check out all the new and exciting products coming from the
Besties Studio HERE


Friday, October 28, 2016

A Christmas card


A good day to my My Besties friends.

I have created a Christmas card with this lovely snowman.
Snowman is colored with my Copic markers.

Hope you like my card.
You can see more pictures in my blog.


Have a nice day!
Hug from Trine
                                           

Wednesday, October 26, 2016

Poppin out Fun with Andrea

Hello Besties!  
Today we have some fun for you with Andrea and her 
fun card.


Andrea has created this fun pop out card and has included
the instructions for you to have a try at it.


Here are the instructions.


Andrea has used elements from many different
paper packs and Mega Kits to decorate with her images.


Check out


Monday, October 24, 2016

Have a Sweet Day


Hello ladies 

Once again today I like to share my card which 
I created using the image by Sherri Baldy 
which is available from
HERE


It was really fun to create this card, just loved it. 
Love the paper line as well ... they all from my stash 
I have distress the paper edges 
My card size is 14cm x 14cm 
I have created few layers using white paper dolly
edge border die cut - noor design 
paper flowers with enamel dots & white pearls 
sentiment by Stampin" Up

I have printed the image on X-Press It blending paper 
and colored in with Copic Maker 
and created my lavender garden field 

I hope you like what you I have to share 
Once again ... Thank you for stopping by and taking a peek . 

Until we meet again 
Crafty hugs 
Rose 

Friday, October 21, 2016

Thinking of You


Hello Besties Fans ...Welcome back to Sherri's blog ...

It's Rose here today to share my card using 
image by Sherri Baldy 


I have did few layered on the card using the shades of blues... 
and trying to focus more on the image rather then details.
I have used doily die cut in the back ground, with white lace & pearls
I have printed the image of X-Press It blending paper 
and color with Copic Markers 

Colors Used 
Skin - E000-E00-E04-E11-E21-R20
Hair - YR27-YR24-YR23- E53-Y17-Y15
Flowers - B000-B00-B01-B02-B05-B06 
Eyes- YG03-YG05-YG17

Materials 

  Small paper roses 
mini white pearls 
flourishes 
small butterfly punch 
large butterfly punch 
bird cage die cut 
label die cut 
liquid pearls 
sentiment by Stampin" Up 

Well that's all for today and do hope you like what I have to share .

Hugs Rose


Saturday, October 15, 2016

Triple Tier Slider Card and Tutorial

Hello Everyone!
Today goes out to all my Ghoulfriends!!!!

This time of year we have ghouls, gourds, pumpkins
and cute little witches everywhere.

Halloween to me is all about the fun of colors and
the creativity you can come up with.

I have a triple tier card for you that has a
Sherri Baldy My Besties digi as my cute little
pumpkin sitter.


The image is img734


As you pull the top tab, the layers reveal all inside
for a fun little surprise.


This was made for a friend in mind, so the sentiment had to
be something she would enjoy and have a good laugh at.


So how did I make this little gem.

Let's start with the supplies.

You will need cardstock in the color of your choice for the base.

Cut your cardstock into
1-6"x 12"
1-5"x 11 1/4"
1- 3 1/2" x 4  1/2"


save your scraps as we will be using a piece of it as well.


Score the  6" x 12" with the 12" side at the top at 4" and 8"


Score the 5" x 11 1/4" with the 11 1/4" side at the top at 3 3/4 and 7 1/2"


On the pieces that are scored, you need to add some slits to the
right scored panel on both pieces.
Cut slits 1" in from the score line and another 1" from the outside edge.
I cut my slits 1/2"in from top and bottom.


These slits let your cards slide up and down inside the card.

You need to start with your  3 1/2" x 4  1/2" piece and
your 5"x 11 1/4"

Remember the little scraps I mentioned.  This is where we 
make a strip to weave into the slit.
Follow the picture.


Add tape or glue to each side of the strip.  This is where you will attach 
the next piece.


Take your 3 1/2" x 4 1/2" piece and lay it on top so the top edges
are flush.


We are going to fold the right side in first and then the left over the top.

Add glue or tape down the edges.  My folder and scissors are placed
to show you the edges I did.


Your first tier is finished


Do the same thing to your next piece with adding your strip and placing
the first complete tier onto it.

Make sure your top edges are even.  You may need to adjust things
just a bit.


Fold like you did for the first tier and glue or tape your edges and you 
have completed the tiers


Decorate and add a tag at the top.  You may
 want to add your 
papers first before putting all together.


You can find many more adorable ideas
and projects over at


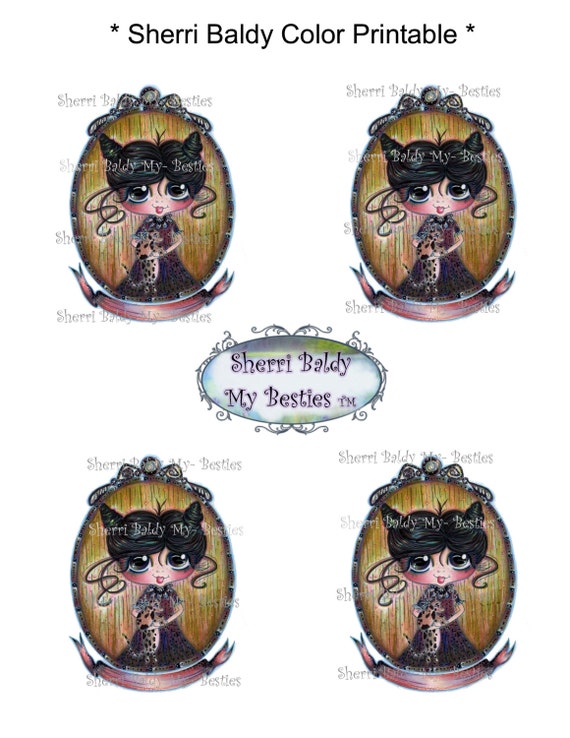
Why not join us.  This image is one of the images offered as a prize
for this month.
All projects and images are welcome to enter.


Also make sure to check out

for more adorable images for all occassions.


Thank you for joining me and having a look.

Happy Crafting

Friday, October 14, 2016

Aged to Perfection


Hello Besties!

Today we have for you a special project from 
Cindy van der Velde.
She has a technique to make your creations look aged.

For this project, Cindy has used this adorable
colored printable.


INSTANT DOWNLOAD Digital Oct 1 Color Printable My Besties By Sherri Baldy


Here are the supplies that you will need to do this.

* Black paper
* dies with embossing parts or embossing folders
* gilding wax
* card topper or stamp. I have used a cardtopper you can find here. I have used a photoshop program to make the cardtopper a little bit larger;

You start with cutting your dies and emboss them.


Take a little bit of gilding wax on your finger and go slightly over the embossed parts.
 It will look like this:


This part hasn't been done totally, it is just to show you how it works. When you think it is waxed enough you polish it up, just like shoepolish, with a soft piece of fabric. I have used gold gilding wax, but you have it in a large range of colours. You can use it on other colours of cardstock too, but to "age" your creation I always use a dark colour of cardstock. You do the same with the gilding wax when you have used an embossing folder or other embossed dies. 


And now the finished result:


It is very simple and you get a great effect! 

Hugs Cindy


There are many more colored printables that you could use
or color your own digi and customize it to your colors.
You can find all of these and more at


Saturday, October 8, 2016

Welcome to Troll-ville

Hey everyone!  Trolls have been running around and getting
into all sorts of mischief.  These little cuties are just waiting
to come and join you in all your crafting ideas.

Today I would like to share with you a mini album
that has been created around these little sweeties
by using the Troll Mega Kit that is available


I have used elements from the Kit to make all the embellies
throughout.   I have used the mushroom and frames along with papers
to decorate the front.


I took the mushroom and made some shrinkydink charms to adorn
the closure for this album

I also colored another troll image and made a charm with her as well.
The image I used is scan0042


On the inside I have used various papers and other elements
to create pockets and tag holders

For this one, I used a flower to hold a tag I made from another
paper included in the Kit.


I used a flower element and bracket elements to hold small tags or
photo mats.


Here I cut one of the tags in half to create a pocket to hold
a mushroom I am using as a tag.


Here are some other pages and just how I decorated them.


Here is a small preview of what all is in the Kit.


Come and check out all the wonderful creations that are
being made with all of the Trolls over on
on facebook.  We would love to see all your Besties creations.


While visiting, check out the GIVEAWAY